Monday, 10 June 2013

Rendering animations using Mass FX

Once the scene has been arranged and the desired effect has been produced through testing the behavoir of the objects as they interact with Mass Fx. key frames need to be set for all of the object movements. this is done by selecting all of the objects in the scene - opening render options - then bake all the objects, this will set up key frames for all of the movements within the scene - set frame length (1-100) and select an export location and render from view port. then save as an avi and you have your animation.

i made a few scenes and produced animations for them both to demonstrate and test out this function


catapult

this animation was made by dropping a ball on a plank to make another ball flip and land in a basket.


first i arranged the scene by creating two spheres, one large one small for the weight and projectile, and a plank to act as a level for the force. to crate the bucket i made a cone and the deleted the top face and added a shell modifier to give it solidarity. i then had to change the shape type of the mush to original so that the ball could enter the basket. after testing the scene for the best effect and angle of capture i used the above method to render an avi of the scene. for this animation i needed to increase the number of frames to include the bounce of the ball. to do this you click time configuration the bottom right and select the desired number of frames, i chose 120 and then rendered.


Dominos

this was both the first and the second animation i did, the first one which i took most of the screen shots from crashed when i pressed something that i shouldn't have and i hadn't saved. so i made another one. the second one i gave the dominos slightly bigger and gave them more mass and as a result had to increase the weight and density of the ball as well.


and rendered the video.

Hammer, UVW practice

The hammer was made in a lesson, by creating a rectangular cube for the head and a long cilinder for the haft, i then edited the hammer by converting to editable poly and manipulating the lines to create a more aesthetic hammer appeal, and then did the same to make an ergonomic haft with a curve.


using the unwrap uv mapping process i loaded the uv template up in to photo shop and this time hand painted the textures.


i then impoted these back into 3Ds as a bit map on the diffuse in the texture editor as well as importing a bump map wich gives the texture some depth when rendered


adding a omni light to the scene and render to see the textures properly, hand painted textures give a far more personal feel to an object and is easier for more complex models than matching up photo realistic textures to intricate uv mapping. it dosnt however have the same sharp ness a high resolution photo texture would but this would also come down to painting abilities or relevant source information.
UV mapping

this allows you to accurately map textures to the geometry of the shape. This gives a far more realistic look to the object and avoids stretching and clipping of an applied texture from bit maps alone.

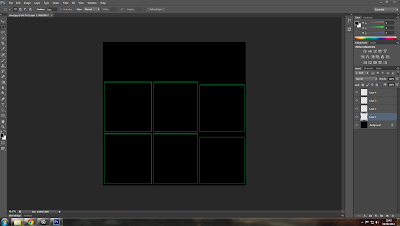
the process for doing this in 3Dsmax is to first make the object you desire to texture, it is simpler to do with less faces and less geometry if posible, then in the modifier list chose UVW unwrap - open the UVW editor - select all of the geometry by face - it should now apear in the UVW editor screen - if the geometry is stacked then select the mapping menu - flatten and press ok - then tools - render UVW template - save the image as and import in to photo shop to start the texture mapping.


after importing the box texture into photoshop and matching it up with the green lines of the UV map the new image can be saved and reopened in 3Dsmax as a texture ready to apply to the object.


the UV map can be imported as a bitmap on the diffuse map,


This is the first render of the cube, as you can see the faces are aligned well dispite this model being slightly cuboid. it gives the model an aesthetic and characteristics that canot be achieved through modelling.

I then subdivided the cube and sculpted the geometry slightly to make the box look more beaten up and    texturised on the model, and to see how well the UV texture adapted to the new geometry.


This is the final render of the edited cube with some signs of damage and possible hints of battle. the uv texture held up well to the manipulation though altering the geometry alot causes stretching and pixilation, this can work in some cases but not in others.


Mass FX experimentation

Mass Fx is the havok physics engine in 3Dsmax, it can be accessed by right clicking the tool bar selecting Mass FX and adding it to the tool bar.

I watch a few tutorials and then had an explorative session with the Mass FX engine, and it was the most fun iv has with digital technology iv had in a while.


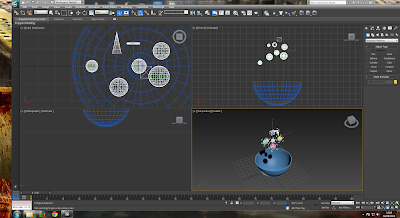
after creating a sphere i hemisphered it by 50% and added a shell modifier to it so it could act as a bowl, i then created a variety of smaller objects to fall in to it. to give the objects Mass FX modifiers the objects need to be selected and a property given to them. the object that you desire to be effected by the forces in the scene make a dynamic rigid body in the Mass FX menu, and object that you wish to remain stationary but so that other objects still interact and colide with them you made a static rigid body. 


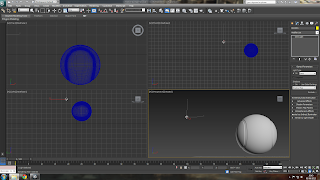
This is what is did here making the bowl a static rigid body and the other objects dynamic rigid bodies. though when i played it to see what would happen i encounted a problem. this was that the geomerty that the static body assigns to the bowl is capped. as the screen shot shows the objects just hit the cap and interact with that, not falling into the bowl. i found that the way to get round this is to change the shape type of the rigid mesh to original rather than convex. this uses the original geometry of the model.


in the second attempt with the new body mesh shape the objects fall into the bowl.
3D modelling

sofas

The first attempt at making a sofa did not go that well. I made too many initial divisions. This made it hard to model as it compressed some geometry


The basic shape is there but with very messy lines

The second sofa i made, i used separate objects to make up the shape and manipulate it from there


Turbo smooth to rund off


I modeled these divetts by ctrl selecting the vertexes and moving them in, this was to give the appearance of leather


after making all of the divetts, i created a separate piece of geometry by attaching a sphere and a cilinder to ask as the buttons on the leather divetts


Then with the buttons cloned and in place i made some feet from cones and unified the top layer of the sofa.


I then put a leather texture on to the main sofa, by uploading a bit map in to the material editor and applying to the object, i also added a wood texture to the feet and a brass texture to the buttons.


This id the render of my final sofa

Sofa 3


Sculptrist

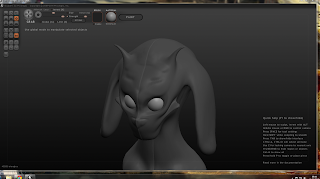
this is made by pixlogic the makers of Zbrush, with minimised tools. i used this at home to experiment with 3D sculpting.


This was the first attempt at using the program


I continued with my attempts to use the tools to model a face


This was the latest version of the model where i made use of all the tools to put more intricate detail into the facial features. still the proportions were off as there was no reference material used.


I tried my hand at non human faces, as this is slightly easier as they dont look as unnatural if the proportions are out. this time i also added extra spheres for the eyes instead of trying to model them out of the skull.


This is the final version of the sculpture


This was my final model in sculptrist using all the techniques iv learned to create a demon face


I also attempted to model an elephant, as a conparison to the one i did in Zbrush but i lost the Zbrush one.


though elements like the ears where easier to sculpt in sculptrist the ease body shape that Zspheres allow you is far superior.


Tennis ball model


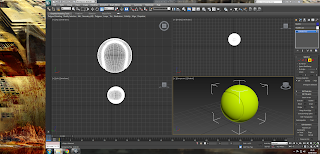
Create cube - modifier - parametric deformer - spherify - select edges - chamfer twice to add geometry- turbo smooth - then with all the edge lines selects hold control and select faces - extude inwards slightly - spherify again and increase iterations to smooth out.


I tried to add textures but had problems making the distinction between areas of the ball and could only get a block colour, this is where UV mapping would come in handy.


These are the final rendered images of the tenis ball with no texture applied


I also inserted a omni light to produce shadow in the scene.